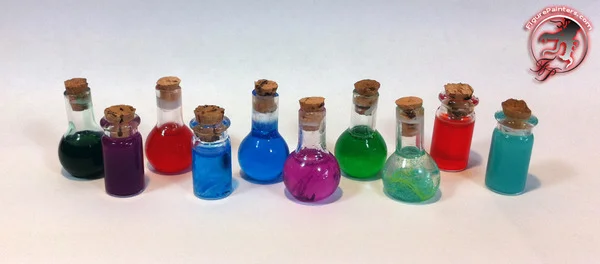

Making Potion Bottles for Super Dungeon Explore
I am using 1-to-1 low odder casting resin to fill them. This stuff has a pretty long working time and will take most of the day to dry. The easy cast is quite easy to work with as you do not have to worry about funny ratios or spending a lot of money for the other kinds of casting resin and a separate hardener.
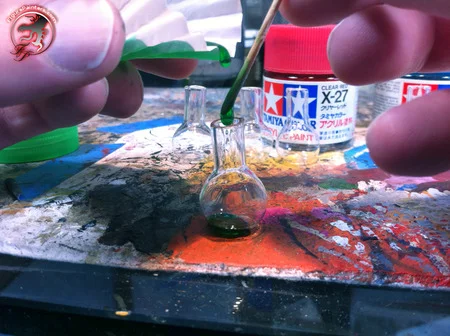
After mixing up a batch, I poured some off into another container and added some of the coloring to it. As you can see in the picture I used some clear Tamiya colors and some regular acrylic paint colors. It only takes a few drops to color it. Start slow as you can always add more to make it darker if you do not like it.
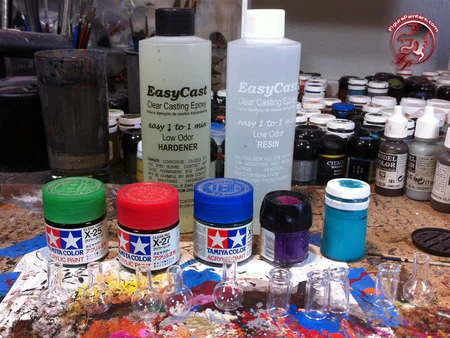
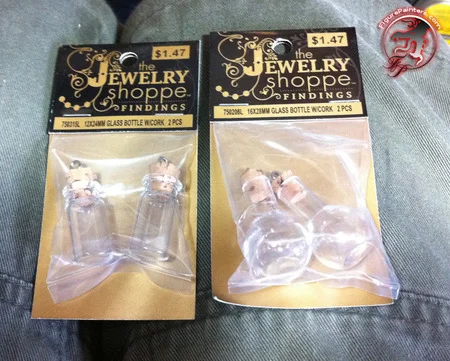
To pour it, I just use cupcake papers. They are cheap, disposable, and generally water proof so you have time to work with your resin and colors. Pour a little of the resin you mixed into one and mix your color in. This way you can make one larger batch of resin, then color it in separate batches. I used a toothpick to help guide the resin into the small bottles. To do this you pour it onto the the toothpick and let it drip off the end into the bottle. This way you don't get resin all over the bottle and have some control over the speed of the flow. You do not want to fill them all the way up as you need some space for the cork.
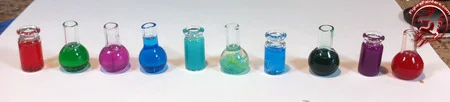
Once you have all your colors mixed up let them sit for most of the day to dry with the corks out. This gives the resin time to harden and off-gas. To get the swirling colors in some of the bottles if you desire, pour the resin in (colored or clear), then dip a toothpick in the desired color and swirl it around the inside of the full bottle once. This will leave a path of the color behind that will stay suspended and give you the "clear marble with swirly colors inside" effect.
Once the resin is all cured (you can poke the top with a toothpick to check) go ahead and put 2-3 VERY small dabs of white glue around the top and push the cork top in. Some of the corks may need to be trimed down depending on how full the bottle is of resin. The glue will take a few days to dry completely and go transparent. You DO NOT want to use super glue as it will fog the inside of the bottle (unless that is what you want!)
This is a pretty simple project to add a lot of fun to your Super Dungeon Explore game. You could also use this for potions in Descent.
And if you are so inclined you can use these for hearts. Just a little glossy red spray paint and you are good to go!